This machine comes with many innovative industry leading features with the largest work area, fastest home sewing machine and with powerful needle penetration.
This machine comes with many innovative industry leading features with the largest work area, fastest home sewing machine and with powerful needle penetration.
Finding it hard to remember all the machine setting for each sewing application? The sewing applications function provides you with all the presets for stitches, the correct foot, and with the ability to change these settings you are on your way to creativity so much more faster.
Ever sewn a top stitch on a collar, sleeve cuffs, or other sections of your creation where the stitching is visible, turned it over, only to find ghastly bunching of threads at the start of your stitching?
Want to know how to avoid this forever?
Watch this informative video.
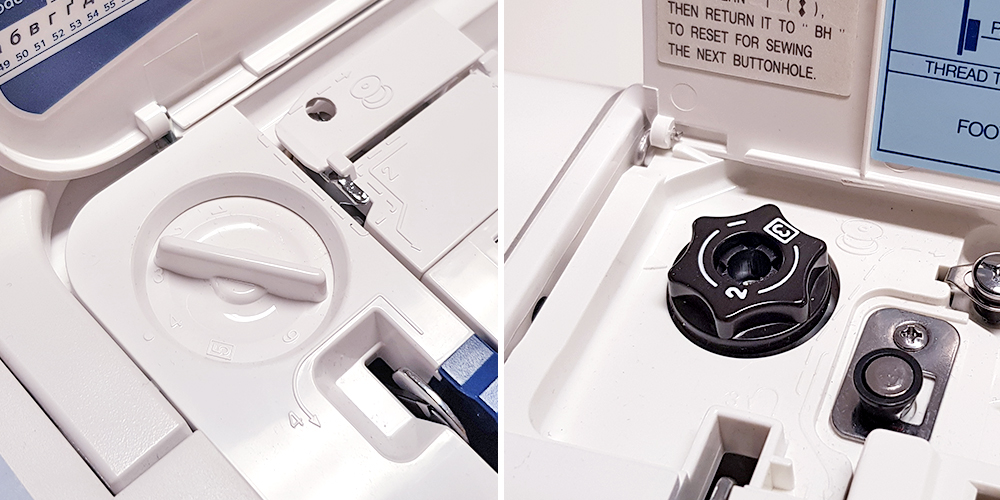
The Foot Pressure Adjustment Dial
Ever had silk or chiffon fabrics slip away from you, oblivious of the feed dog traction, or do you find your quilts and denims struggle to move? It’s time to look at the pressure dial for the presser foot – not to be confused with the tension dial for your needle thread.
The foot pressure adjustment dial sets the amount of pressure that the presser foot places on the fabric. The amount of pressure would need to vary if you were switching between lightweight sheer fabric and multiple layers of thick fabric for the machine to feed the fabric evenly.
Where is the Foot Pressure Adjustment?
Depending on your sewing machine model, you may find the pressure adjustment, on the left top, inside the opening top cover of your machine or your machine may have an on-screen adjustment menu.
When to Make an Adjustment to the Amount of Pressure
If you find that the fabric slithers and slips when the presser foot is down, you need to increase the pressure on the presser foot. If the fabric is held so tightly that the feed dog is unable to move the fabric, decrease the amount of pressure on the pressure foot.
Depending on your sewing machine model, you may have up to 6 foot pressure settings. We recommend setting the pressure to minimum for light weight fabric such as organza and voile, medium for fabrics such as cotton and polyester, and maximum for heavy weight fabric such as drill and denim.
Automatic Foot Pressure Adjustment
Some of our higher end computerised sewing machine models have built in sensors which will automatically detect the thickness of the fabric and make adjustment to the foot pressure. Models include HMC15000QM, MC15000, MC14000, MC12000, S9, MC9450QCP, MC9400QCP and S7.
Alternatives to Pressure Adjustment
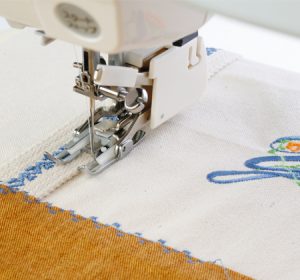
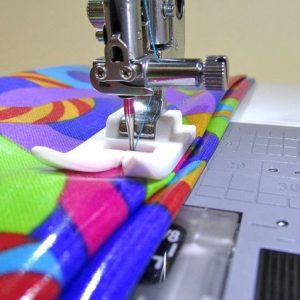
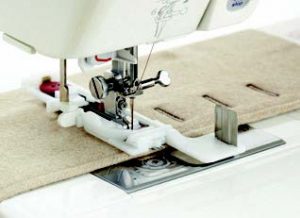
Another solution to make your struggles with challenging fabric go much easier is to use an Even Feed Foot, also commonly known as a Walking Foot.
The foot is designed with a set of feed dogs to assist with smooth feeding. With this foot, fabric can be sewn without puckering, as the fabric is gripped and fed by both the upper and lower feed dogs.
At times, fabrics such as vinyl and faux leather may stick to a metal foot and not feed properly. An Ultra Glide Foot which is moulded from a special resin can help solve the problem.
Sewing Tip: When sewing through many layers or thick fabric, it is always recommended to also increase your stitch length. Increasing the stitch length, will increase the movement of the feed dogs, this increases the fabric being fed through the machine while sewing.
With the Auto Pivot Function, the foot will automatically raise when you stop sewing, with the needle in the down position for easy pivoting.
Speak to your local Janome stockist to ask which sewing machine models have this great feature!
Dying to do ruler work but your machine has an Auto Presser Foot Lift? Follow this step by step tutorial and you’ll be able to do ruler work on the following machines: MC14000; MC12000; Skyline S9; Skyline S7.
Keep your threads in check with spool holders. Check out some of our top tips…
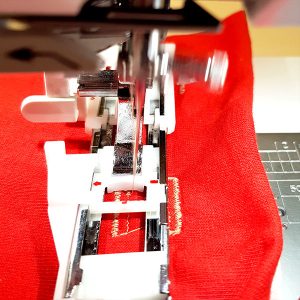
When it comes to buttonholes, the perfect fit is key. Long gone are the days when you need to manually mark out the size of each buttonhole, making it a guessing game as to whether you’ll actually have a reliable closure on your garments.
Many of Janome’s modern sewing machines today come equipped with a one-step buttonhole foot and a stabilizer plate for effortless buttonhole creation. You can sew buttonholes of the appropriate size by simply placing your button into the button holder of the foot and pushing the clamp right up against the button. The foot will measure the size of your button and ensure the buttonhole is made to the correct size.
Button placed into the foot – this does the sizing of the buttonhole automatically for you.
When the buttonhole foot is attached to the buttonhole stabilizer plate, the machine will feed various kinds of fabric and uneven layers more smoothly instead of eating the fabric or causing the needle to get stuck in position.
If you have an older model, you might have a one-step buttonhole foot which looks similar to the one pictured below, except that it may not have the more advanced feature of lengthening or shortening the buttonhole.

This upgraded one-step buttonhole foot comes standard with all 9mm Janome sewing machine models. Basically, it allows you to tweak the length of your buttonhole slightly to accommodate knit/stretch fabrics or domed buttons.
By adjusting the screw to the left or right, the marker will move to L – for long, or S – for short, thereby increasing or decreasing the buttonhole length.

When working with knit fabrics, such as a stretchy T-shirt which may be more prone to tugs and pulls or get stretched during a machine wash cycle, a slightly shorter buttonhole will ensure the button remains securely in place once buttoned.
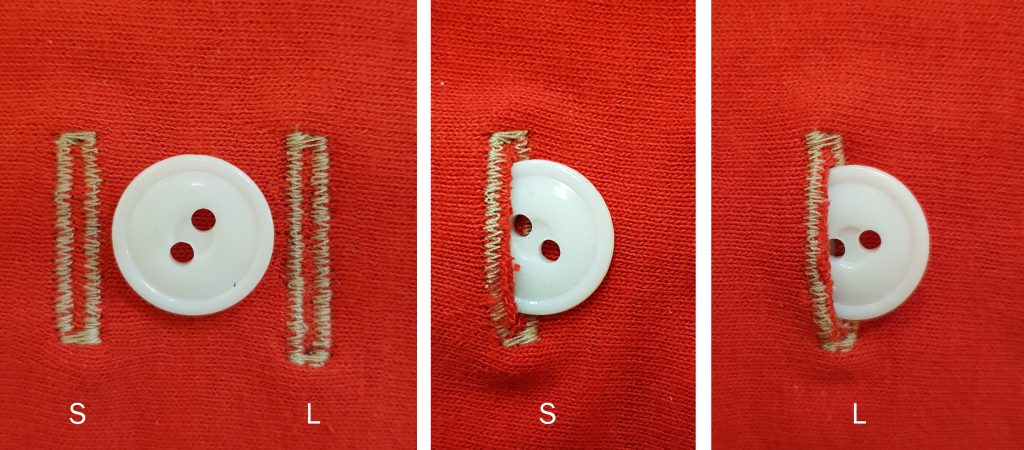
A shorter buttonhole on knit fabric can prevent the button from slipping out.
On the other hand, if you’re dealing with heavy fabric or using domed, thicker, or handmade buttons, you may require a larger button hole.
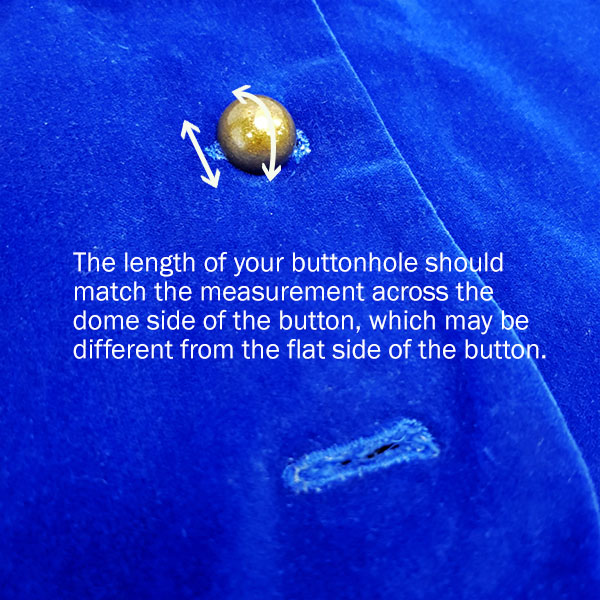
Have you ever measured your button, sewn your buttonhole, only to find that it still isn’t big enough?
This is often the case when the thickness of the button hasn’t been taken into consideration. For example, a dome shaped button might be 1/2″ wide from end to end, but if you measure across the dome you will notice that it is slightly longer.
To take the thickness of the button into account just add a little length to your buttonhole to accommodate the button. You can adjust your one-step buttonhole foot slightly by adjusting the marker to the L position.
The upgraded one-step buttonhole foot and stabilizer plate are great tools to have for making all the difference when sewing buttonholes.
If your machine does not come with them or is not of a compatible model, you are most welcome to discuss your options with an authorised Janome stockist, who might suggest upgrading to a machine which offers these fantastic features.
Sewing 101 – threading comes before sewing.
Threading the needle on the sewing machine is pretty straight forward for most of us, it’s threading the bobbin that’s a bit tricky at times.
Front-loading bobbin
First on the scene were the front-loading bobbin style where you put the bobbin into a metal bobbin case before inserting it into the bobbin slot, which is usually tucked away behind the accessory box on the front of the machine
Front loading machines can be challenging for some but luckily the drop-in or top-loading style bobbins came along, giving you an added choice in purchasing a front or top-loading modern sewing machine.
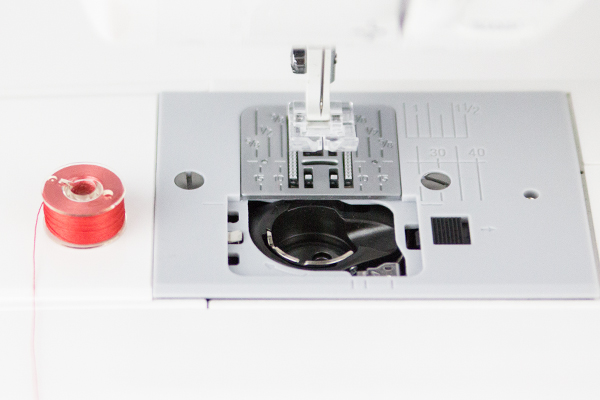
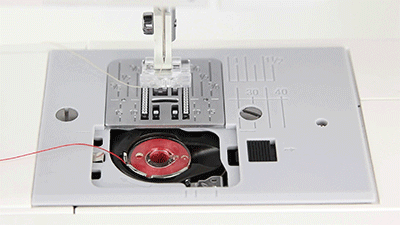
Top-loading bobbin
Found in most modern sewing machines, top-loading bobbins are easier to remove and replace, with the added benefit of a transparent cover so you can see just how much thread is left without opening the machine.
Threading a top-loading bobbin generally involves 4 steps:
Remove the bobbin cover plate. Place the bobbin in the case with the thread running counter-clockwise or form the letter “P” for Perfect.
Thread through the flat tension spring starting at the first notch (1) and draw the thread to the left until it slips into the second notch (2). Pull out at least 4” of thread to use in the next step.
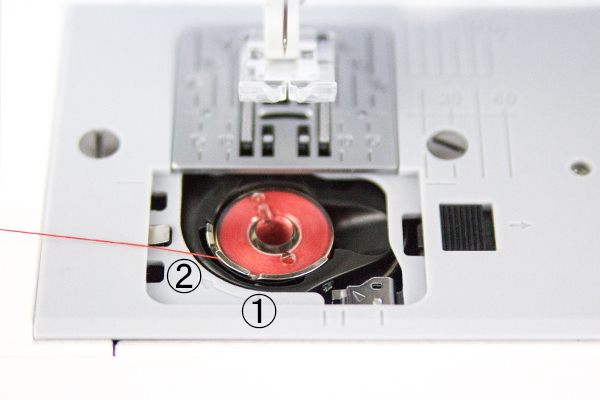
Hold on to the machine thread (needle thread) while turning the handwheel to raise and lower the needle. This will pick up the bobbin thread – look for a little loop of bobbin thread just under the presser foot. Pinch this loop and pull gently to bring up the entire bobbin thread. Pull both threads to the back of the machine, under the presser foot.
Pop the bobbin cover plate back on and now you’re ready to sew!
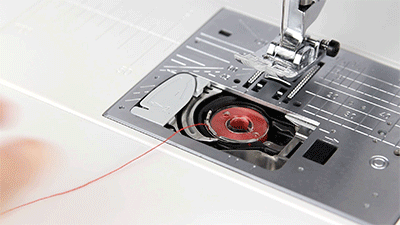
The top loading system is great… but can it be even simpler? Can we skip the hassle of step 3 completely?
Glad you asked because that’s the new Janome easy set bobbin.
Janome’s easy set bobbin
With the easy set bobbin all you have to do is to drop in your bobbin, making sure it’s in the correct counter-clockwise direction, pull the thread along the guides, then pop the cover back on.
Yup, that’s all there is – it even cuts the excess bobbin thread for you!
The easy set bobbin style is on the following models – MC15000QM, MC15000, MC14000, MC12000, MC9900, MC9450QCP, MC9400QCP, MC8900QCP Special Edition, MC8200QCP Special Edition, MC6700P, Skyline Series (S9, S7, S6, S5, S3), DM7200, Sewist 780DC, Sewist 740DC, DC6100, DC6050, DC6030, DC3200.